
Ever wondered “CapCut how to use”? Whether you're a beginner, aspiring content creator, or seasoned editor, CapCut brings powerhouse video editing within reach—powered by intuitive design and cutting-edge AI. It's free, cross-platform (mobile, desktop, and web), and filled with features you'd expect only from paid software.
In this guide, I’ll walk you through everything from installation and the main interface to advanced AI tools, text, audio, visual effects, and exporting. You'll learn step-by-step how to craft polished videos worthy of TikTok, YouTube, Insta Reels, and beyond. Ready to become a CapCut pro? Let’s get started!

I. CapCut Overview & Capabilities
A. What Is CapCut?
CapCut is an AI-enhanced video editor and content creation platform from ByteDance, designed for creators of all levels .
It’s 100% free—no subscriptions or watermarks for core features .
The platform is fully cross-platform: mobile (iOS/Android), desktop (Windows/Mac), and web—ideal for flexible workflows .
AI tools include smart editing features: auto captions, script-to-video, scene detection, upscaling, background remover, motion tracking, and more .
B. Why CapCut Stands Out
Seamlessly integrates with TikTok but excels independently.
Supports professional-level editing with no upfront cost (compared to InShot, KineMaster, etc.).
AI-driven tools save time, especially for creators busy pumping out content .
II. Getting Started: Install, Log In & Interface
A. Installation & Setup
Mobile: Download from App Store or Google Play.
Desktop & Web: Grab the installer for Windows/Mac or go straight to CapCut's online editor (no install needed) .
Login options: Use TikTok, Google, Apple, Facebook, or email—allowing cloud sync across devices.
B. Workspace Overview
Preview window: See edits in real-time; pinch-zoom, drag, rotate, and apply visual cues directly on clips.
Timeline: Multi-track layout (video, audio, text, overlays, effects). Perfect for layering and footage mixing .
Toolbars:
Main toolbar (with no clip)**: Add clips, AI captions, templates, stickers.
Sub-toolbar (clip selected)**: Provides tools for trimming, filters, speed, transformations, keyframes, etc. .
III. Basic Editing Essentials
A. Importing & Project Setup
Create a New Project, select your source clips from camera or gallery .
Supports MP4, MOV, AVI, MP3, WAV, FLAC, and popular image formats .
Configure resolution (vertical, square, landscape) and frame rate (30/60fps).
Add clips to the timeline—it auto-arranges chronologically for immediate editing.
B. Trimming & Rearranging Clips
Trim: Tap a clip and drag edges to shorten or extend .
Split: Use the split icon at the cursor for mid-clip edits .
Reorder/Delete: Move or remove segments easily to refine flow.
Basic Transforms: Crop, rotate, flip, freeze frame—commanding fundamental control.
IV. Advanced Editing Techniques
A. Keyframe Animations
Keyframes let you animate clip position, scale, rotation, and opacity over time .
Example: Create smooth zoom-in by adding start/end keyframes and adjusting scale.
Animate text or overlay movement for pro-level storytelling.
B. Speed Control & Stabilization
Speed ramping: Customize playback tempo—slow-mo, hyperlapse, varying speed curves .
Stabilization: Auto-fix shaky footage.
Auto Reframe: AI edits to crop dynamic scenes into different aspect ratios.
Motion Tracking: Stick text/stickers to moving objects .
V. Text & Caption Tools
A. Text Overlays
Add titles, select fonts, colors, motion presets .
Layer multiple text tracks over or under video.
Fine-tune typography: size, outline, shadow, tracking.
B. AI Captions & Voice Tools
Auto captions: AI speech-to-text adds subtitles automatically .
Text-to-speech: Type your narration and let CapCut speak it professionally.
Multilingual support: Translation-ready captions.
Animated text effects: Dynamic entrances/exits to maintain viewer attention.
VI. Audio Editing & Sound Design
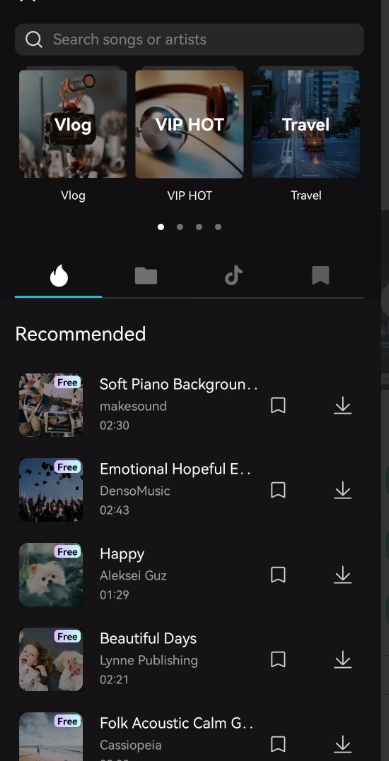
A. Import & Manage Sound
Use stock library or import MP3, WAV, AAC, FLAC .
Extract audio from video clips.
Voiceover recording directly in-app.
B. Enhance & Polish Audio
Fade and keyframe volume: Perfect for smooth background transitions.
Voice effects: Add pitch changes and filters for character voices.
Noise reduction: Clean up ambient sound with AI tools.
Sound FX library: Add cues like swipes, accents, cinematic tones.
VII. Visual Effects & Filters
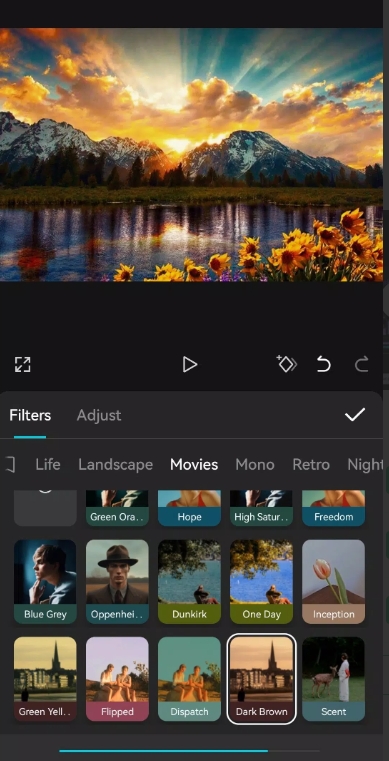
A. Filters & Color Grading
Choose from cinematic presets or apply Color Adjustment manually .
Adjust brightness, contrast, saturation, hue, warmth, and sharpness.
Control filter intensity for refined aesthetics.
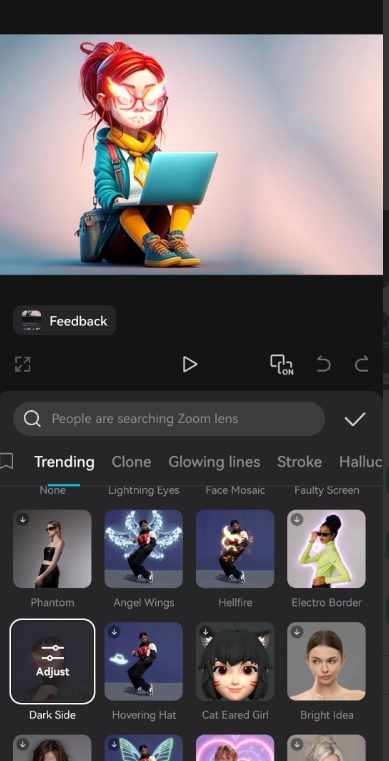
B. Pro-Level Visual FX
Chroma key: Remove backgrounds using green screen.
Masks & isolation: Apply targeted effects to specific areas.
Blend modes: Use layers creatively with Mix, Multiply, Screen, etc.
Motion blur: Enhance realism in moving footage .
VIII. Transitions & Animation
A. Basic & Creative Transitions
Standard transitions: fade, slide, zoom, wipe.
Pro transitions: 3D effects, dynamic wipes, custom keyframed transitions.
B. Motion Effects & Particles
Add motion to text or overlays for storytelling punch.
Simulate camera effects: zoom, pan, shake.
Particle FX: confetti, rain, flare for atmosphere.
Use animation presets for fast, high-impact visuals.
IX. CapCut Templates & AI Tools
A. Template-Based Creation
Access vertical-social templates for TikTok, Shorts, Reels .
Swap in personal media while retaining preset styles.
Customize elements and re-export as your own unique clip.
B. AI-Driven Features
Script-to-video: Paste text, generate a draft video with voice cues .
AI upscaling: Enhance low-res footage instantly.
Background remover & relight: Isolate subjects and change environments .
Auto-captions: Quick subtitles; ideal for short-form content.
Voice cloning: Generate voices in multiple languages.
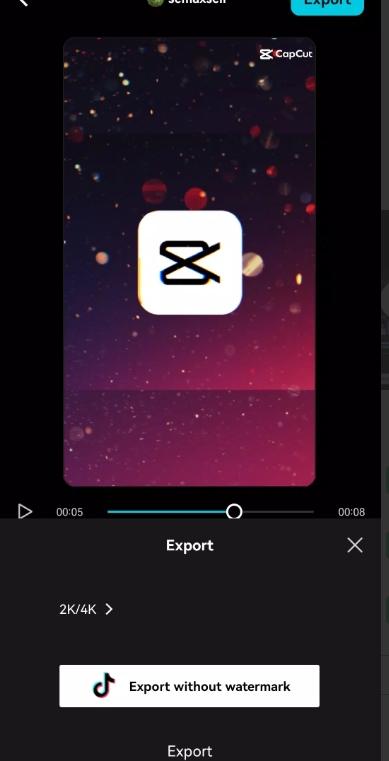
X. Exporting & Sharing
A. Export Settings
Resolution: Up to 1080p mobile, 4K on desktop.
Format: MP4 with H.264 recommended for social platforms.
Frame Rate: Match source at 30 or 60fps for smooth playback.
B. Publishing Options
Direct export to TikTok, Instagram, YouTube.
Save to device, desktop, or export to cloud (Google Drive, Dropbox).
Desktop allows batch exports and multiple version saves.
By now, you’ve mastered “CapCut how to use”, covering foundational editing through AI enhancements. CapCut delivers pro-level features for free, spanning mobile to desktop. Whether trimming your first clip or releasing your fifth polished video, here's what you have:
Intuitive trimming, splitting, and managing multiple tracks
Keyframe animation for dynamic motion
AI tools: auto captions, script-to-video, background removal
Audio clean-up, sound FX, voiceovers
Polished visual effects with color grading and transitions
Templates tailored to social media trends
Seamless export and cross-platform sharing
Pro Tip: Start light—trim, transitions, captions. Then layer in animation and audio effects. Next, test AI tools with script-to-video or voiceovers. Finally, export a masterpiece.